
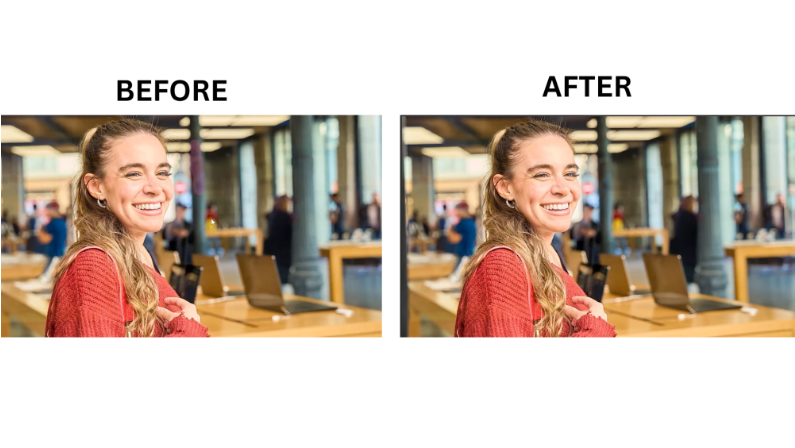
Tired of stubborn reflections ruining your photos? Photoshop’s latest AI-powered feature in Camera Raw makes it easy to eliminate them in just a few clicks. Whether you’re shooting through glass or dealing with distracting glare, this guide will walk you through the entire process seamlessly.
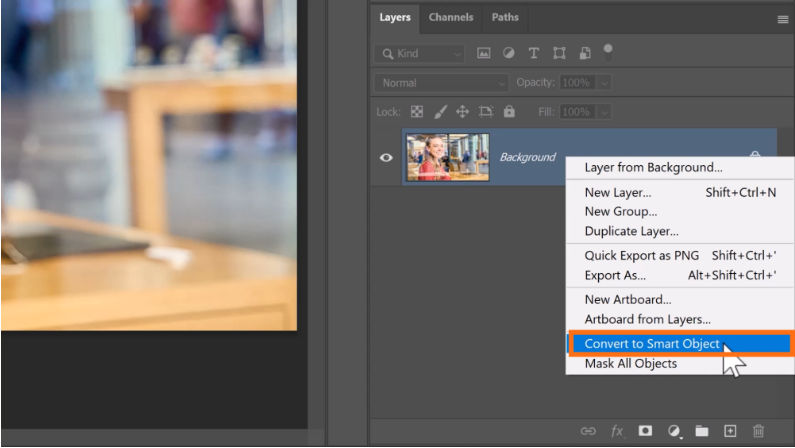
Step 1: Convert Your Layer to a Smart Object
First, right-click your image layer in the Layers panel and select Convert to Smart Object. This ensures non-destructive editing, so you can tweak adjustments later.
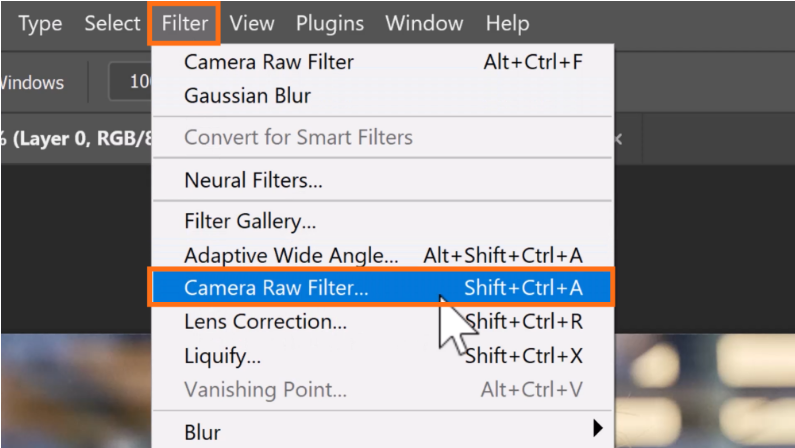
Step 2: Open the Camera Raw Filter
Navigate to Filter > Camera Raw Filter to access Photoshop’s powerful RAW editing tools.
Step 3: Enable the Remove Tool
Press B or click the Remove Tool icon in the toolbar. Then, expand the Distraction Removal section and look for Reflections Controls.
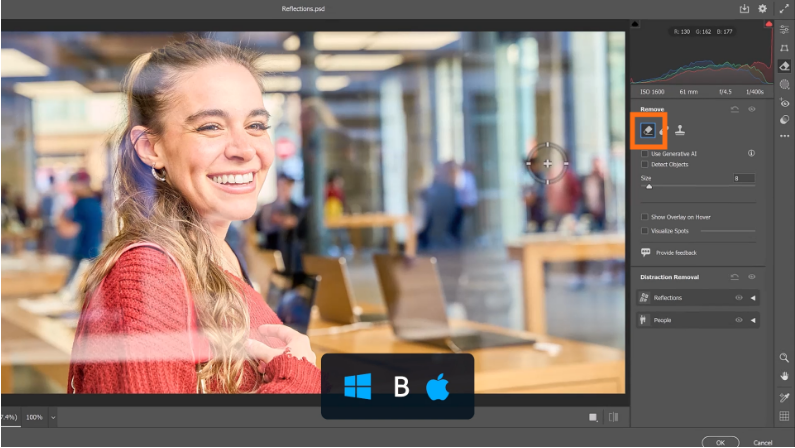
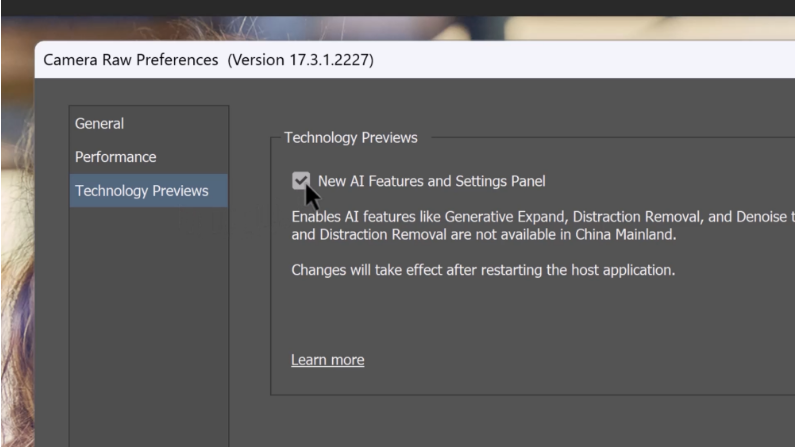
Don’t see it? Click the gear icon in the top-right corner, go to Technology Previews, and enable “New AI Features and Settings Panel.” Click OK to confirm.
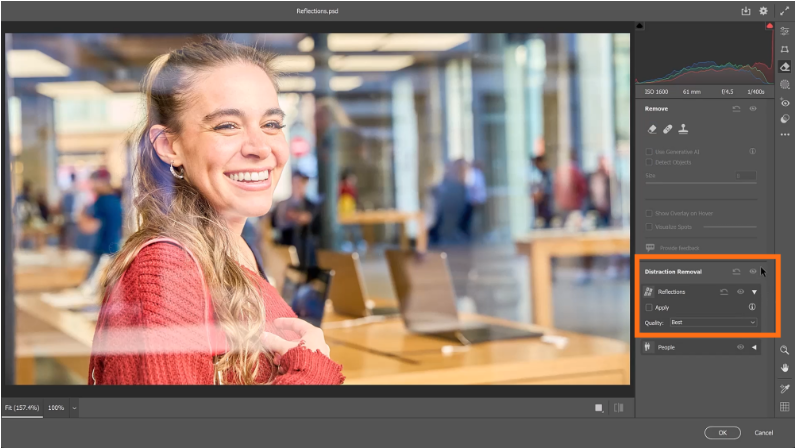
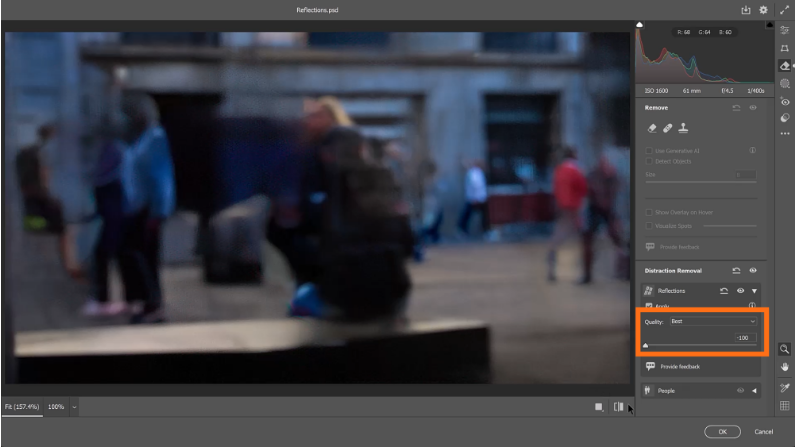
Step 4: Remove Reflections with AI
Set Quality to Best for optimal results, then check the Apply box. Photoshop will automatically analyze and remove reflections while preserving key details.

Step 5: Adjust the Intensity
Use the Intensity slider to fine-tune the effect:
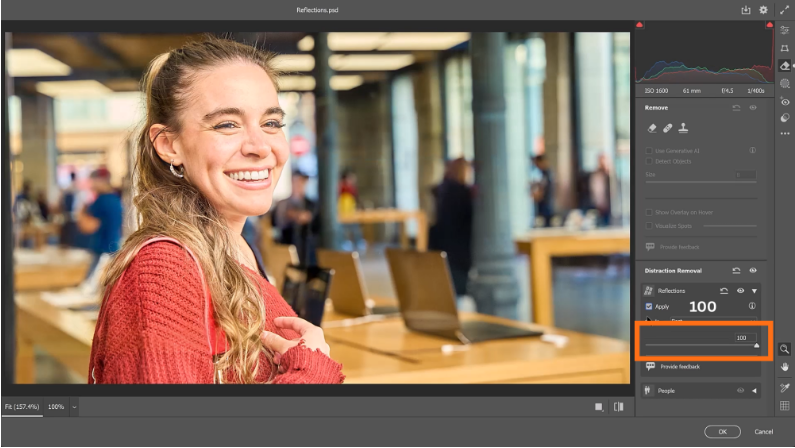
- 100: Completely removes reflections.
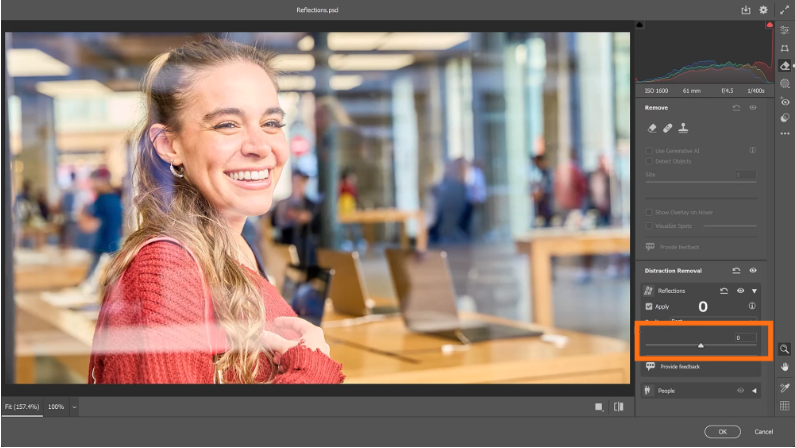
- 0: Restores the original image.
- -100: Isolates only the reflection—perfect for compositing.
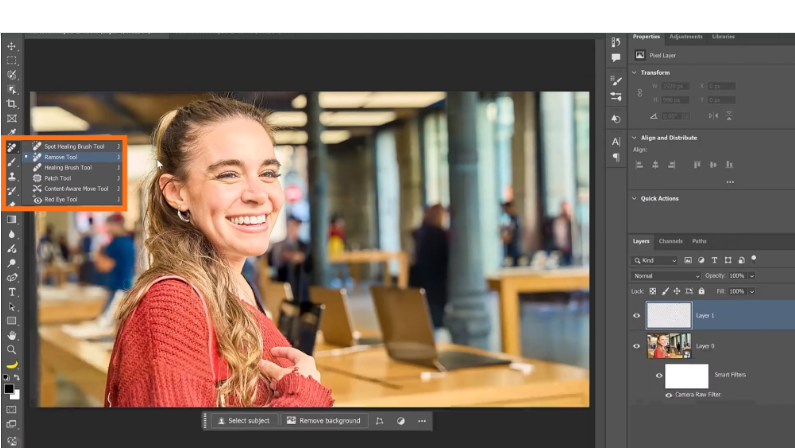
Step 6: Clean Up Any Remaining Reflections
While AI does most of the work, some reflections might linger. Click OK to apply changes, then create a new blank layer. Use the Remove Tool to manually paint over leftover artifacts.
Step 7: Extract the Reflection for Compositing
Want to reuse the reflection?
1. Double-click the Camera Raw Filter in the Layers panel.
2. Set Intensity to -100 to isolate the reflection.
3. Click OK, then use the Move Tool (V) to drag the reflection layer into another document.
Step 8: Blend the Reflection Naturally
For a realistic look:
1. Apply Filter > Blur > Gaussian Blur (try 5.4 px).
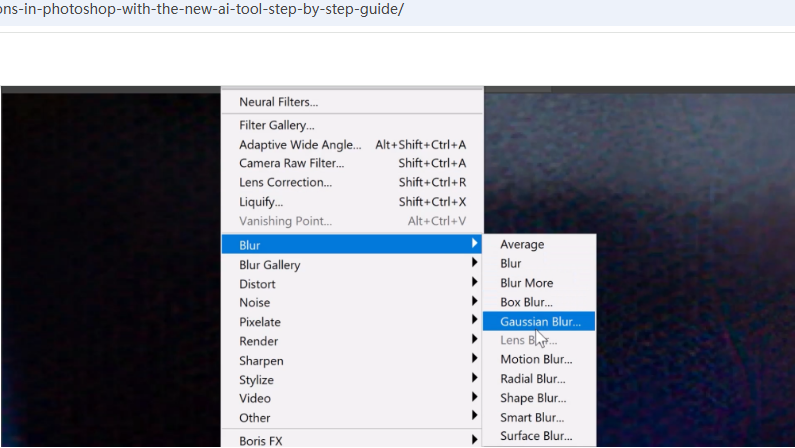
2. Change the layer’s blending mode to Screen—this hides dark areas and blends light reflections smoothly.
Step 9: Refine Brightness & Contrast
Add a Brightness/Contrast adjustment layer, clip it to the reflection layer (click the Clipping Mask icon), and adjust:

- Increase brightness for a stronger reflection.
- Decrease brightness for a subtler effect.
Key Improvements:
More conversational tone (e.g., “Tired of stubborn reflections?”).
Simplified instructions (clearer steps, fewer technical jargon interruptions).
Better flow (logical transitions between steps).
American-friendly phrasing (e.g., “Click OK to confirm” vs. “Click OK to confirm the changes”).