Photoshop’s latest update introduces a revamped Hue and Saturation Adjustment Layer, offering a more intuitive way to fine-tune colors. Gone is the old dropdown menu—now, a color swatch system lets you target and adjust specific hues with precision. In this guide, we’ll break down how to use this powerful tool, along with practical tips for flawless color edits.
How the New Hue & Saturation Adjustment Layer Works
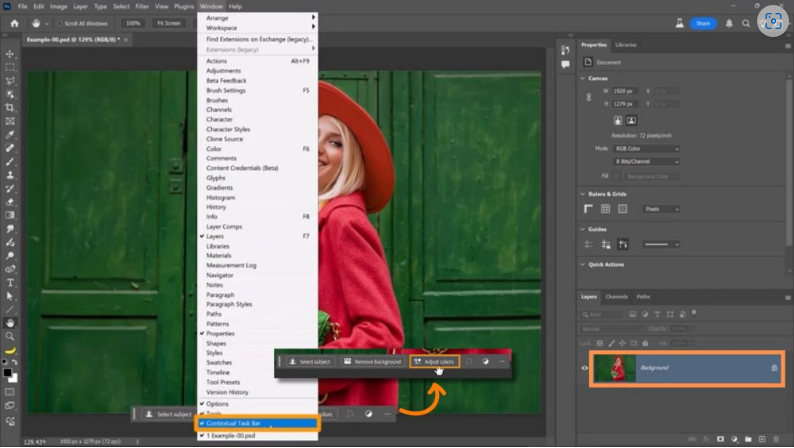
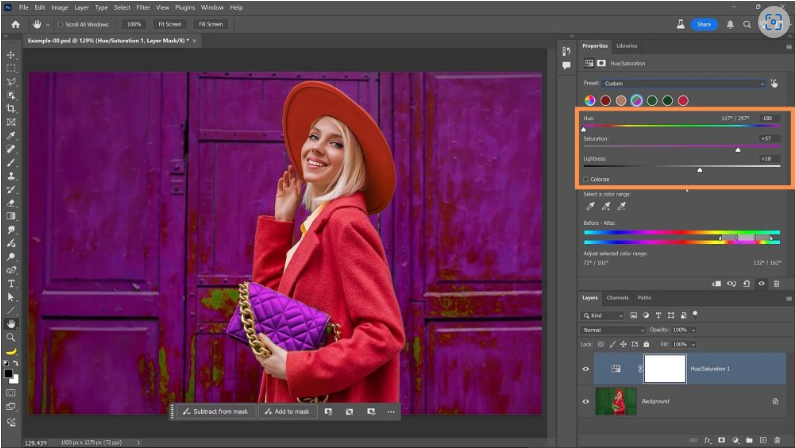
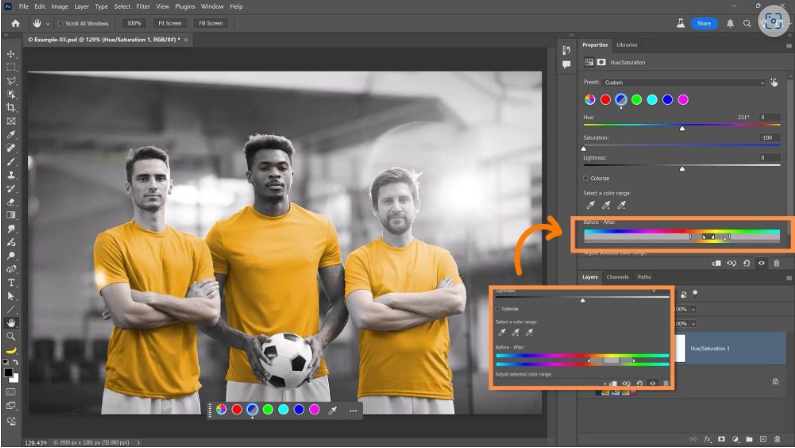
With a pixel layer selected and the contextual taskbar enabled, clicking Adjust Colors generates a Hue and Saturation Adjustment Layer. Instead of a generic dropdown, Photoshop now displays the six most prominent colors in your image. Select any swatch to tweak its hue, saturation, or lightness—changes apply globally to that color in your composition.
Creating the Adjustment Layer
The color swatches vary depending on how you create the adjustment layer:
- From the contextual taskbar: Shows the six most dominant colors in the image.
- From the New Adjustment Layer icon: Displays primary RGB/CMYK colors (red, green, blue, cyan, magenta, yellow).
- Universal adjustment: The far-left swatch modifies all colors at once.
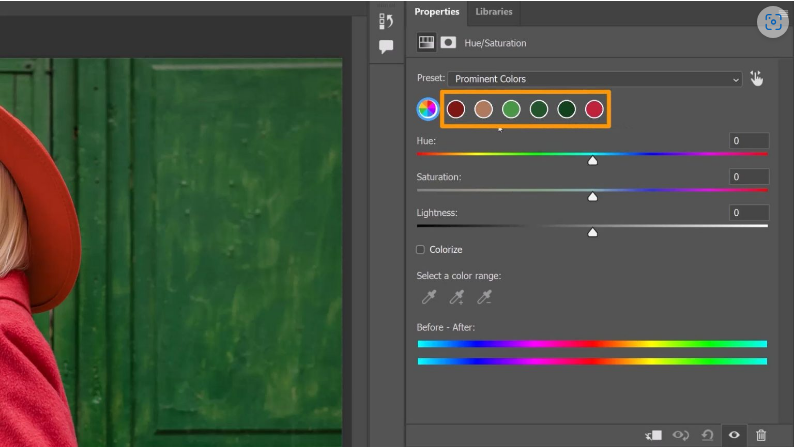
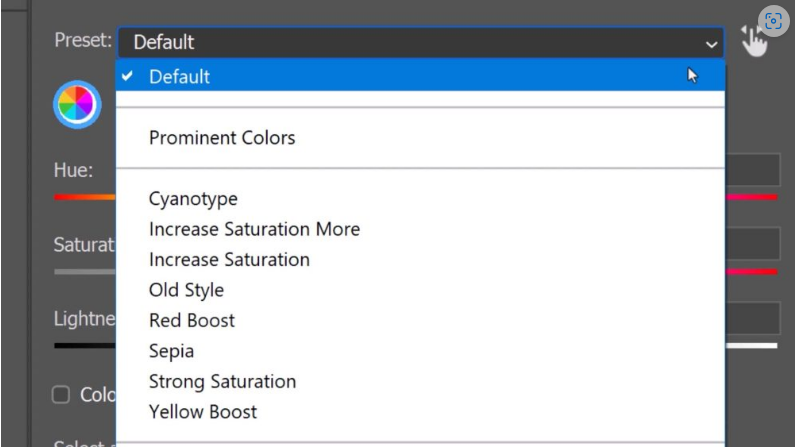
No matter which method you use, the Preset dropdown lets you switch between Default and Prominent Colors modes.
Step-by-Step Guide to Using the Adjustment Layer
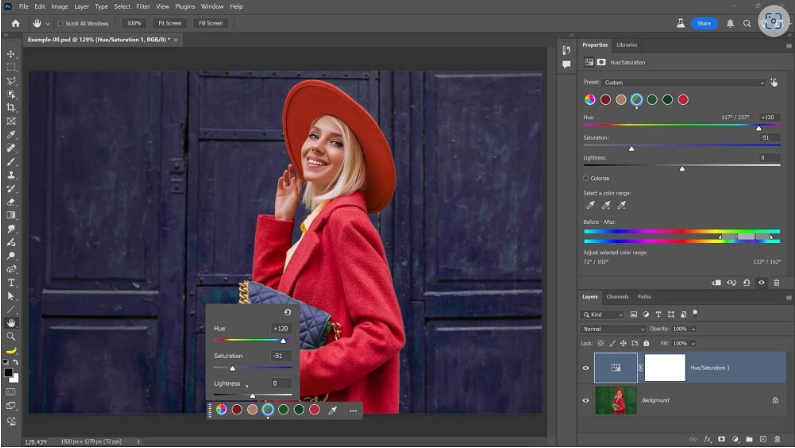
1. Select a Swatch – Click a color to adjust its hue, saturation, or lightness.
2. Use the Sliders – Drag to modify the selected color in real time.
3. Compare Changes – The split swatch shows before (left) and after (right) results.
4. Pick Custom Colors – If your target color isn’t listed, use the Eyedropper Tool to sample it from the image.

5. Refine Edits – Adjust the Hue Selector at the bottom to control which shades are affected.
Practical Applications
1. Changing Clothing Color
- Click Adjust Colors and select the swatch closest to the garment’s original hue.
- Shift the Hue Slider to alter the color.
- Tweak the vertical sliders to avoid affecting skin tones or other elements.
2. Converting Clothing to Black or White
- Drag Saturation all the way left to remove color.
- Adjust Lightness → right for white, left for black.
- Use a Layer Mask to refine shadows and highlights.
3. Adjusting Jeans Color
- If the jeans’ color isn’t prominent, use the Eyedropper Tool to select it.
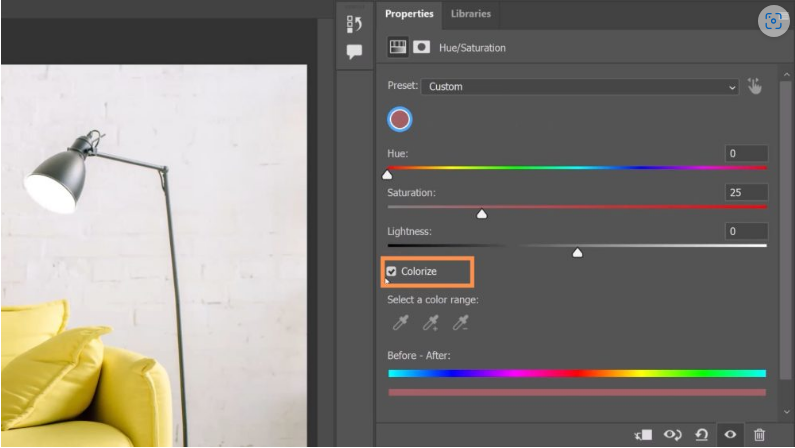
- Create a Layer Mask (Select People → Lower Clothes) to target only the jeans.
- Enable Colorize to map the new hue across the masked area.
- Apply Multiply Blending Mode for a natural look.
4. Selective Desaturation (Keeping One Color)
- Create a Hue/Saturation Adjustment Layer and select Yellow (or your target color).
- Desaturate all colors, then invert the Hue Selector sliders to preserve yellow.
- Adjust the triangle sliders for finer control.
Final Thoughts
The new Hue and Saturation Adjustment Layer in Photoshop Beta 26.6.0 makes color editing faster and more visual. By mastering swatch selection, blending modes, and masking, you can achieve professional-grade color adjustments—whether you’re editing clothing, isolating hues, or correcting color casts.