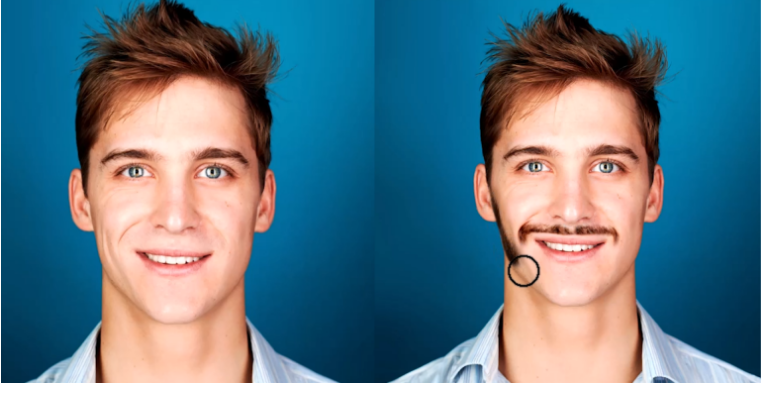
Adding convincing facial hair in Photoshop can be challenging—simply selecting an area and generating a beard often looks fake or distorts facial features. But don’t worry! In this step-by-step guide, we’ll use Photoshop’s Generative Fill and masking techniques to achieve seamless, natural-looking results.
1. Enable Quick Mask Mode

Press Q on your keyboard to enter Quick Mask Mode. The red overlay indicates masked areas.
- Use the Brush Tool (B) to paint with black (deselect) or white (reselect).
2. Customize Quick Mask Settings
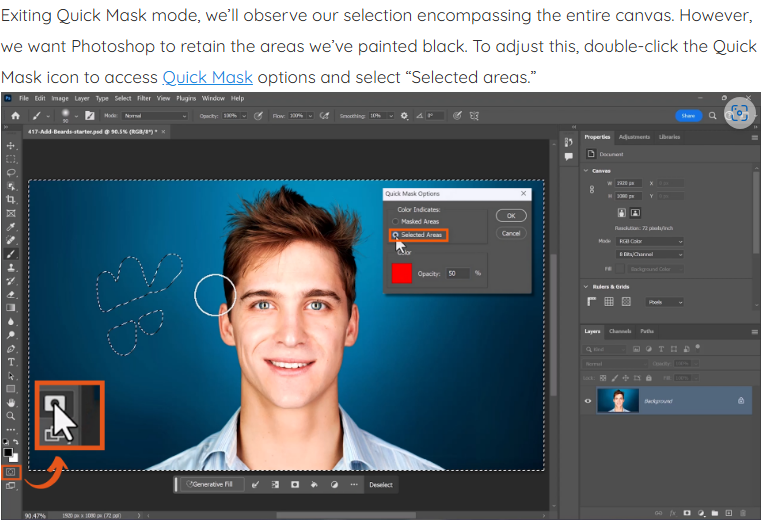
After exiting Quick Mask Mode (Q again), you’ll notice the selection covers the entire canvas. To fix this:
- Double-click the Quick Mask icon in the toolbar.
- Choose “Selected Areas” instead of “Masked Areas.”
3. Change the Overlay Color
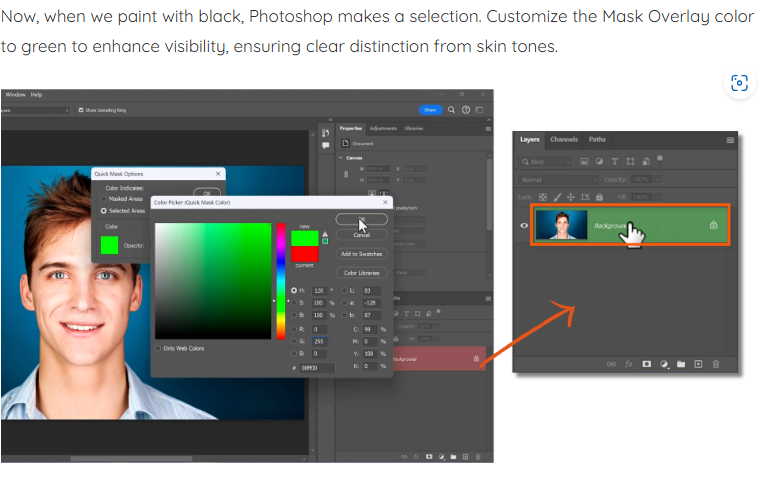
For better visibility, switch the mask overlay color to green (or another high-contrast shade) to distinguish it from skin tones.
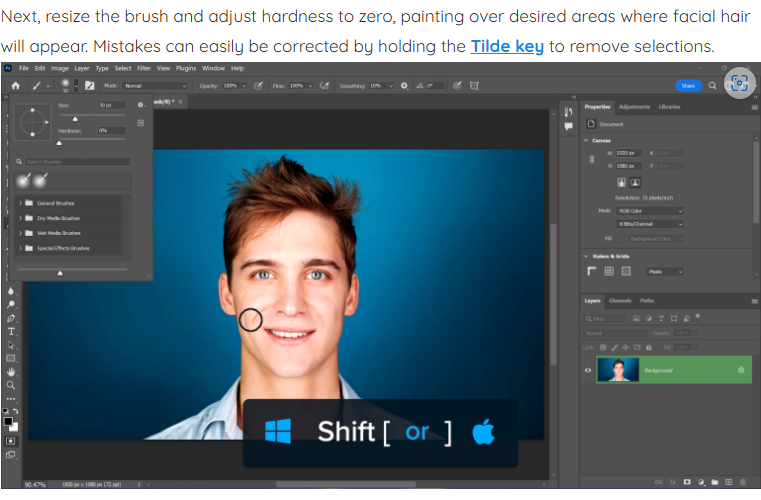
4. Paint the Beard Area
- Adjust your brush size and set hardness to 0% for soft edges.
- Paint over where you want the facial hair to appear.
- Fix mistakes by holding Alt (Option on Mac) while painting to erase selections.
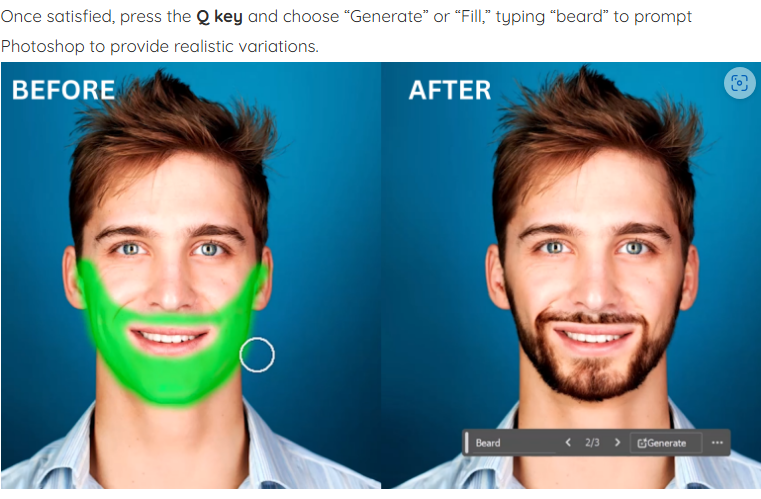
5. Generate Facial Hair
Press Q to exit Quick Mask Mode, then click “Generate” or “Fill.”
- Type “beard” in the prompt to let Photoshop create realistic variations.
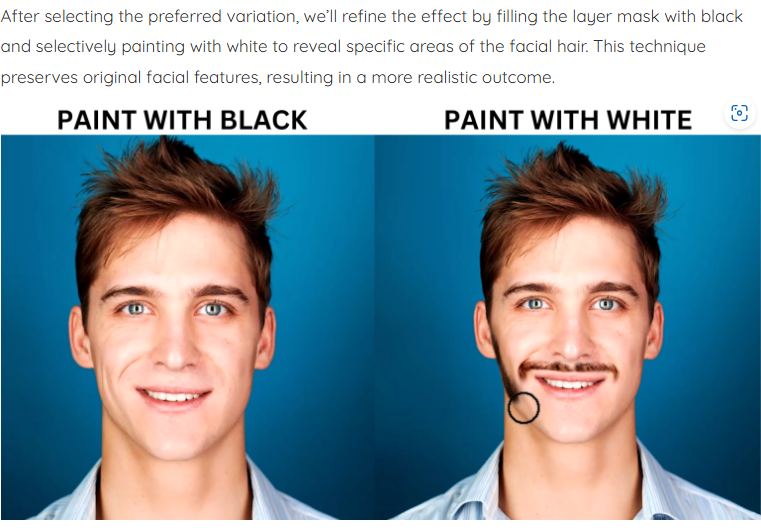
6. Refine the Effect
- Apply the best-generated option, then fill the layer mask with black.
- Use a soft white brush to reveal only the most natural-looking hair sections, preserving facial structure.
With these steps, you’ll achieve professional-grade facial hair that blends perfectly with your portrait. Whether you’re a beginner or an advanced user, this method ensures realistic, customizable results every time!
For more Photoshop tips, check out [Photoshop Training Channel](https://www.youtube.com/@PhotoshopTrainingChannel).