Thanks to Photoshop’s latest Beta (v26.2), adding realistic embroidery effects to your designs has never been faster or more fun. Whether you’re customizing jerseys, hats, or patches, the new Embroidery filter makes it easy to achieve professional, fabric-like results.
In this guide, we’ll take you step-by-step through the process—from prepping your logo to blending it seamlessly onto fabric for an ultra-realistic finish.
Step 1: Remove the Background for a Clean Logo
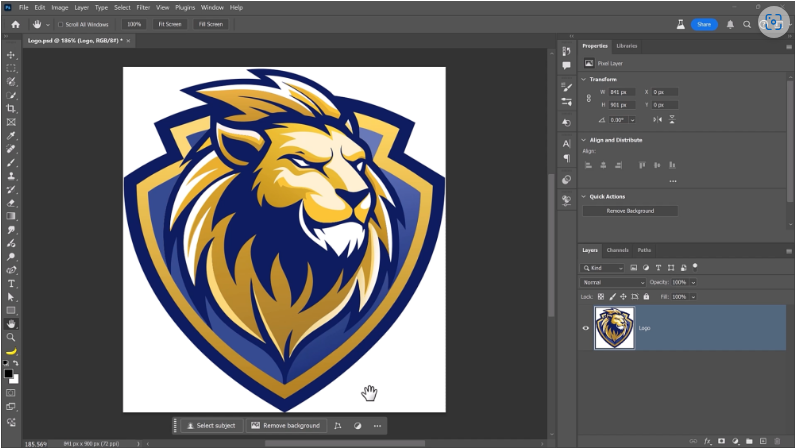
Start by opening your logo in Photoshop and clicking Remove Background (or use the Object Selection Tool if needed). This ensures a transparent background, so the embroidery effect applies only to your design.
Step 2: Apply the Embroidery Filter
Go to Filter > Parametric Filters > Embroidery (or search for it in the filter panel). Photoshop will automatically:
- Convert your logo into a Smart Object (if it isn’t already)
- Apply a realistic thread texture
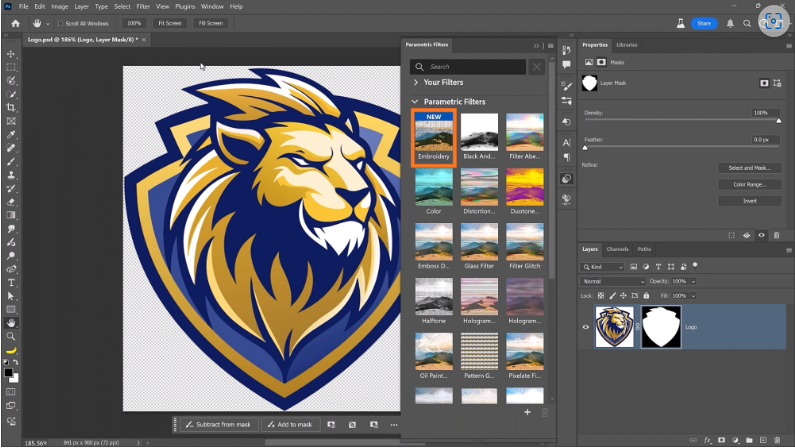
The default result is impressive, but we’ll tweak it further for perfection.
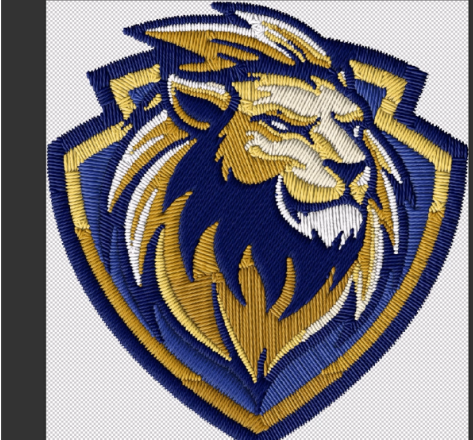
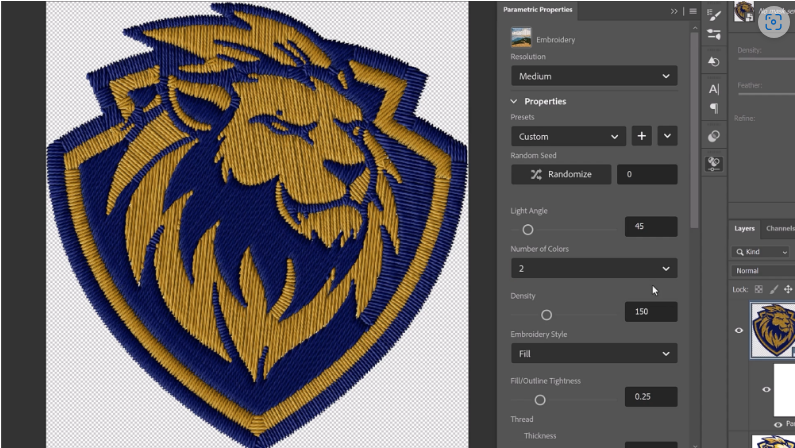
Step 3: Fine-Tune the Embroidery Look
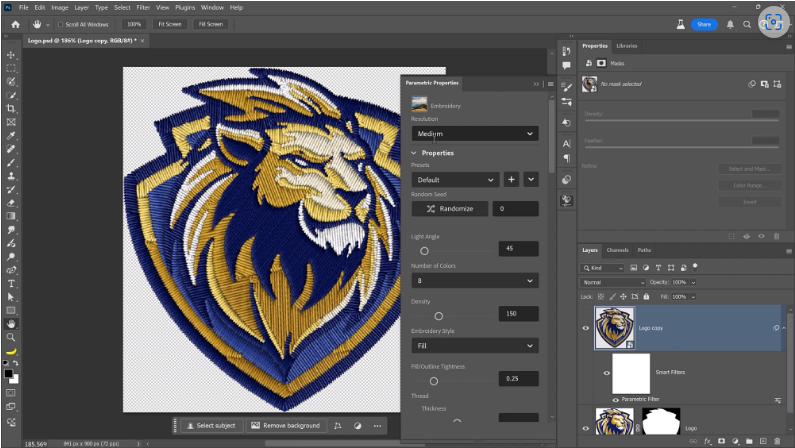
Inside the Parametric Properties panel, adjust:
- Number of Colors – Try 8 for a classic embroidered look, or reduce it for a simpler two-tone style.
- Imperfections – Set to 0.25 for subtle thread variations (too much can look messy).
- Custom Colors – Change thread hues if needed, though the defaults often work best.
Step 4: Boost Resolution for Ultra-Realistic Detail
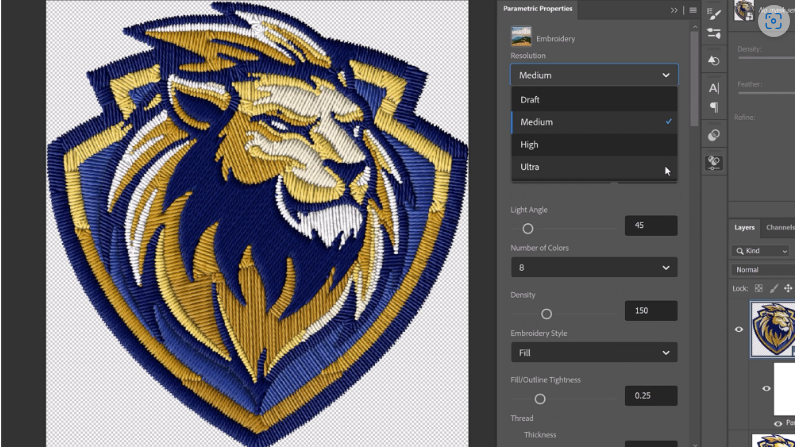
Switch the resolution to Ultra for sharper thread definition. Pro tip: Do this last—higher settings slow down previews while adjusting other parameters.
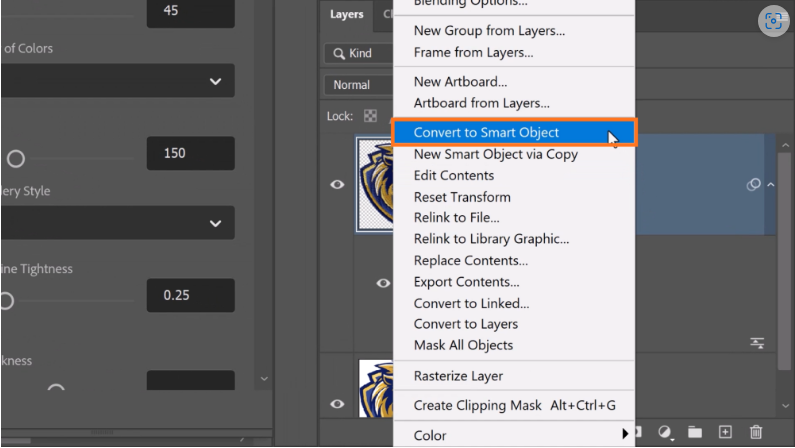
Step 5: Place the Patch on Fabric
1. Convert the patch to a Smart Object (right-click > Convert to Smart Object) to preserve quality when resizing.
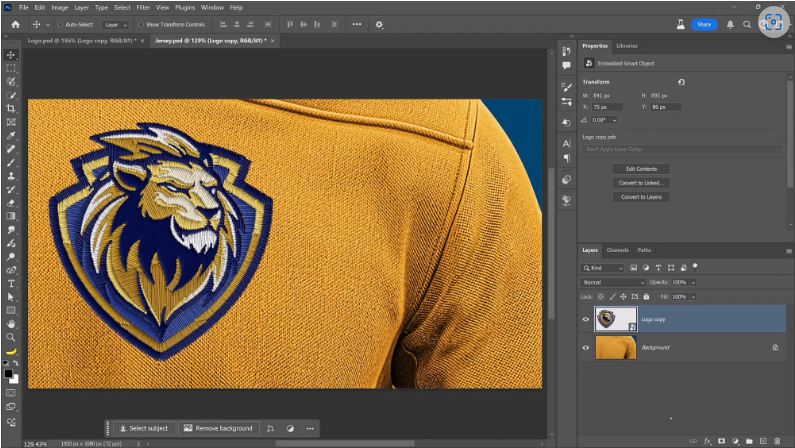
2. Drag it onto your jersey image and position it naturally (e.g., centered on the chest).
Step 6: Add Realistic Shadows & Dimension
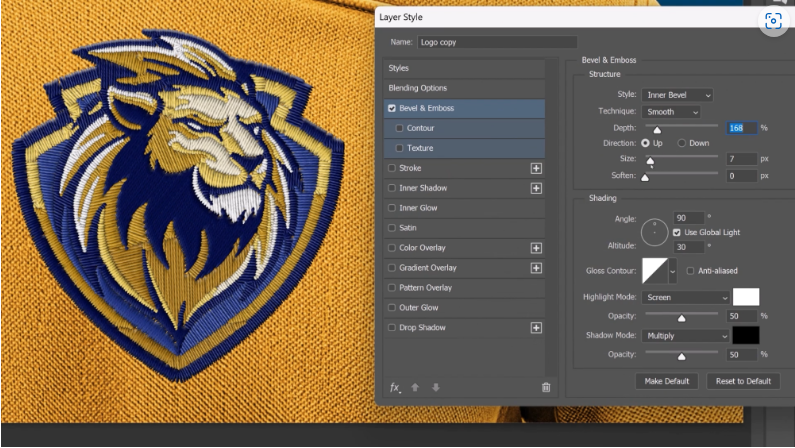
Open Layer Styles (FX icon) and apply:
- Bevel & Emboss – Adjust Depth and Size for a raised 3D effect.
- Drop Shadow (x2) –
- First shadow: Dark brown, low Distance (for contact shadow).
- Second shadow: Larger, softer, lower Opacity (for depth).
Step 7: Final Touch-Ups with Camera Raw
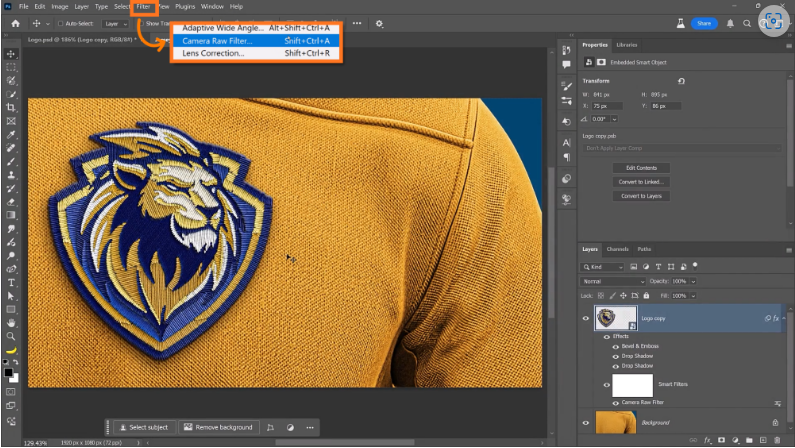
Apply the Camera Raw Filter and enhance:
- Texture & Clarity – Makes threads pop.
- Tint – A slight green shift can soften overly digital tones.