Photoshop Parametric Filters are interactive, customizable tools that let you apply dynamic effects to any layer. In this guide, we’ll walk through creating your own filters using Adobe Substance Designer—a powerful node-based editor that integrates seamlessly with Photoshop.
What Is Adobe Substance Designer?
Adobe Substance Designer is a versatile tool for creating parametric textures, materials, and filters. Unlike Photoshop’s layer-based workflow, Substance Designer uses a node-based system, where each node represents an adjustment or effect. This approach lets you build reusable, non-destructive processes that adapt to different inputs.
The real power of Substance Designer lies in its ability to generate parametric materials—entire workflows for textures and effects, not just static images. These can then be turned into custom Photoshop filters, offering unmatched flexibility.
If you’re new to this, check out our previous tutorial on using the Embroidery filter to create realistic patches for inspiration.
Example 1: Building a Basic Blur Filter
Step 1: Launch Adobe Substance Designer
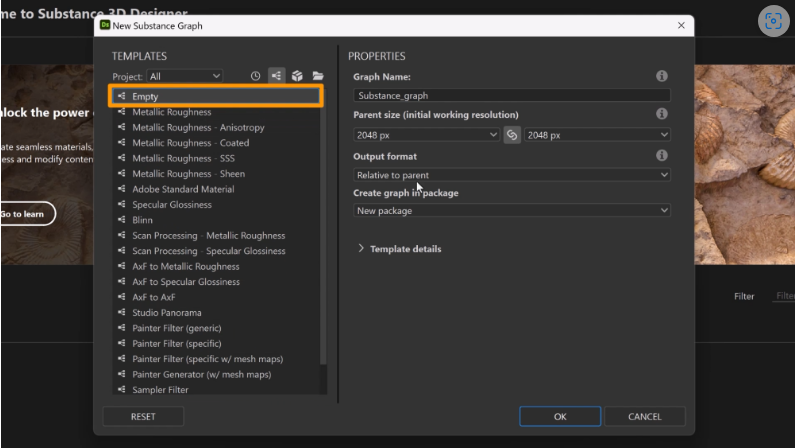
Open Adobe Substance Designer from Creative Cloud. From the welcome screen, select New Substance Graph and choose the “Empty” template.
To reset your workspace, go to Windows > Reset Layout.
Step 2: Navigating the Interface
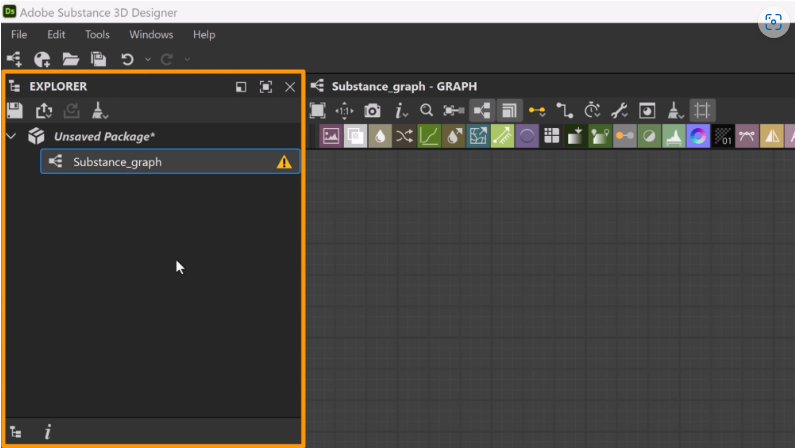
- Explorer Panel (Top-Left): Stores project assets.
- Library Panel (Bottom-Left): Holds nodes and resources.
- Graph View (Center): Your main workspace for building filters.
- 2D & 3D Views (Bottom): Real-time previews (focus on 2D View for Photoshop filters).
Step 3: Creating the Filter
1. Add an Input Node: Press Spacebar, type “Input Color”, and select it. This brings image data from Photoshop.

2. Add an Output Node: Press Spacebar, type “Output”, and place it. This sends the processed image back to Photoshop.
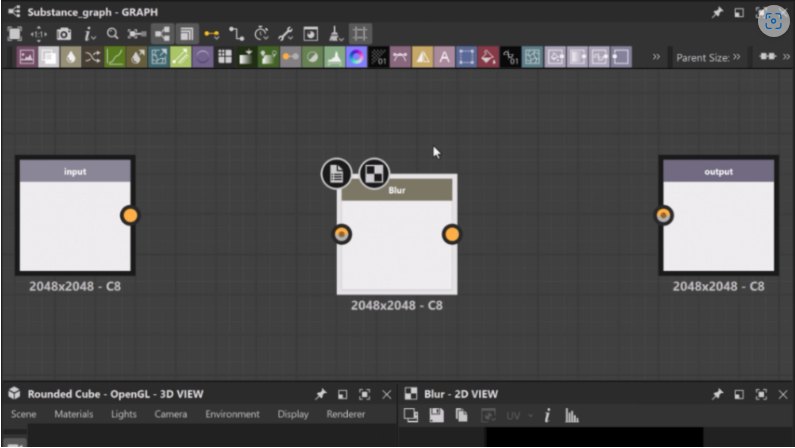
3. Apply a Blur Effect: Search for “Blur”, add the node, then connect the Input → Blur → Output by dragging between nodes.
Step 4: Previewing the Effect
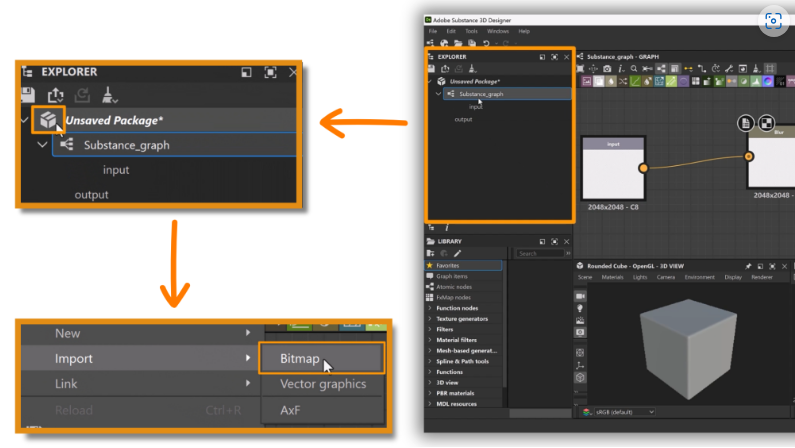
- Import an Image: Right-click your project in the Explorer Panel, choose Import > Bitmap, and select a test image.
- Drag the image into the Input Node to see a live preview.
Step 5: Adding Adjustable Controls
To make the filter customizable in Photoshop:

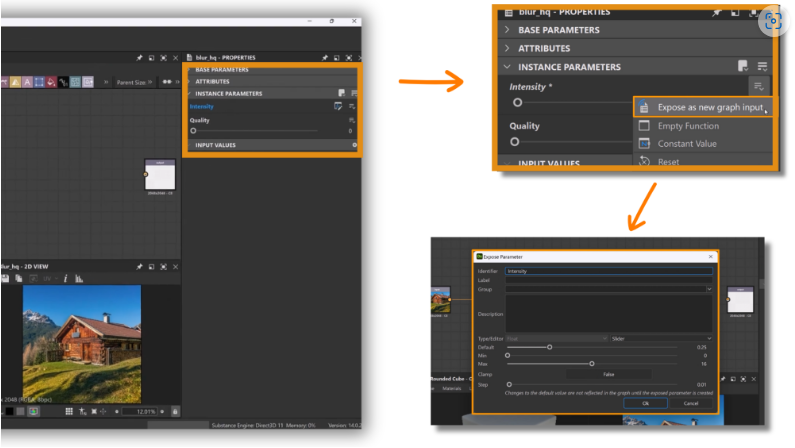
1. Expose Parameters: Select the blur intensity slider, click the Flyout Menu, and choose Expose as New Graph Input.
2. Label the Parameter: Name it something clear, like “Blur Amount”.
Step 6: Finalizing the Filter
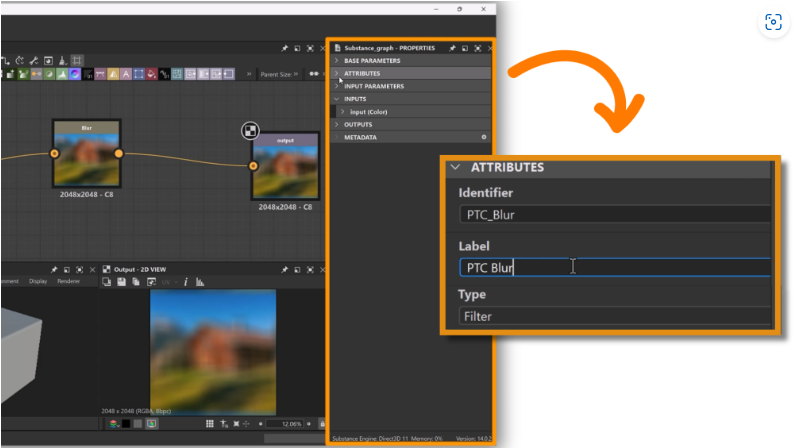
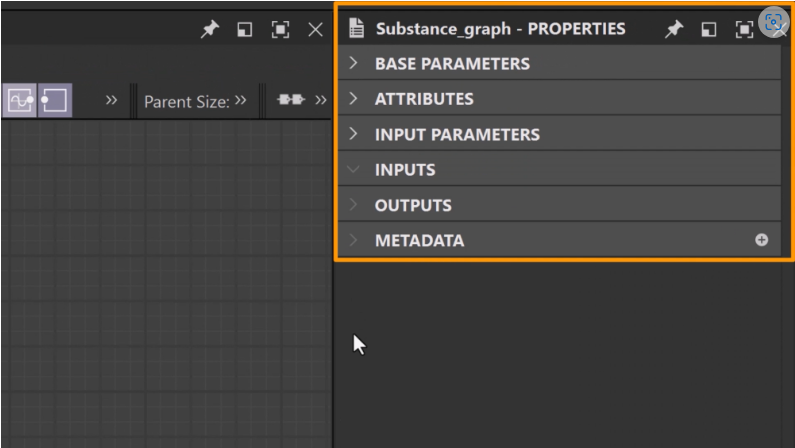
- Name Your Graph: Double-click the graph, go to Attributes, and set an Identifier (e.g., PTC_Blur) and Label (e.g., PTC Blur).
- Save: Press Ctrl+S (Win) / Cmd+S (Mac).
Step 7: Exporting for Photoshop
1. Click the package and select Publish SPSAR.
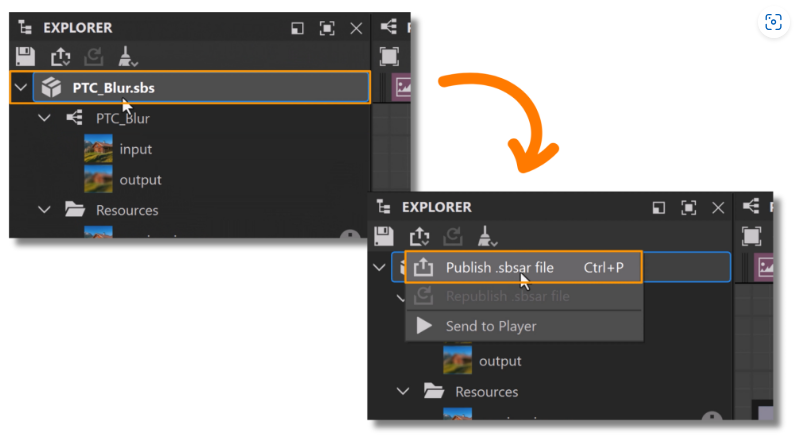
2. Name your file (e.g., PTC Blur) and save.
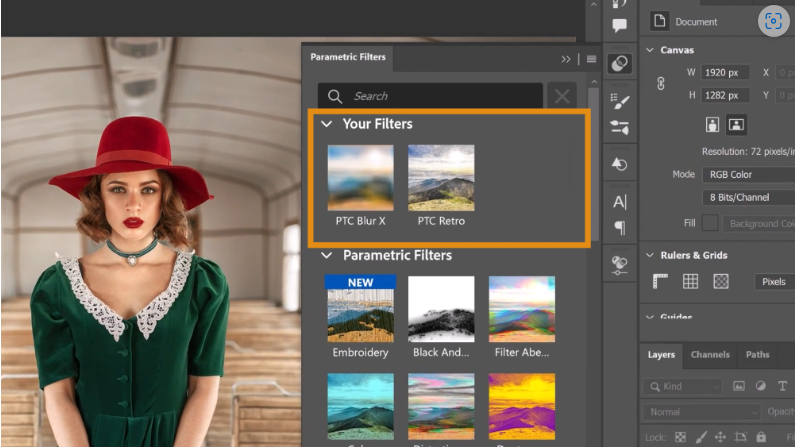
Step 8: Importing into Photoshop
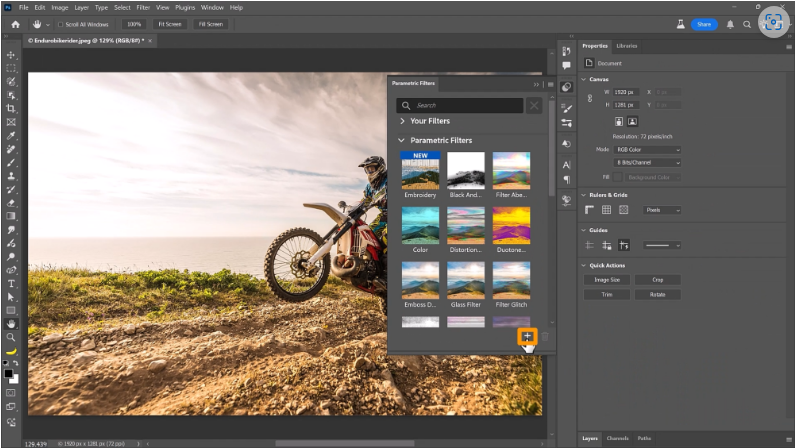
1. Open Photoshop Beta, go to Filters > Parametric Filters, and click the + icon.
2. Select your .SPSAR file. Your filter will now appear under “Your Filters”.
Done! You’ve built a customizable blur filter for Photoshop.
Example 2: Creating a Retro Photo Effect
Now, let’s design a more advanced filter—a vintage photo effect with adjustable grain, stains, and scratches.
Step 1: Set Up a New Substance Graph
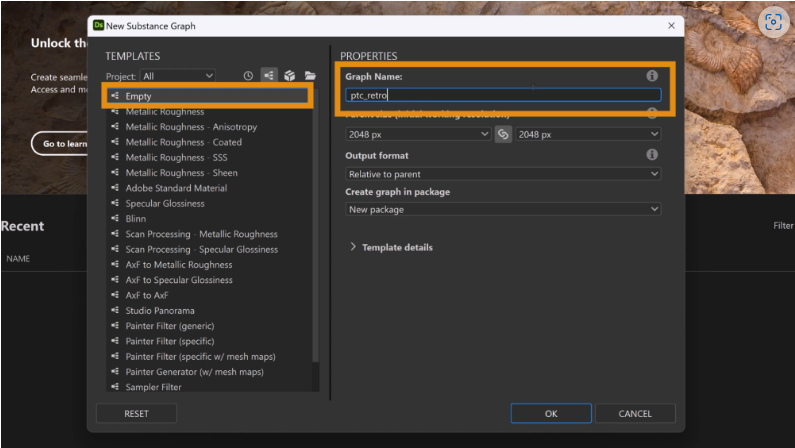
- Create a new Substance Graph, name it PTC Retro, and save (Ctrl+S).
Step 2: Add Input and Output Nodes
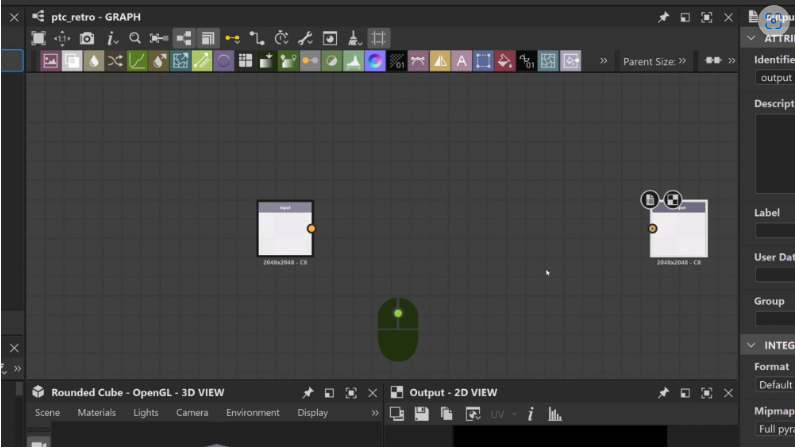
- Search for “Input Color” and “Output”, then place them in the graph.
Step 3: Import a Preview Image
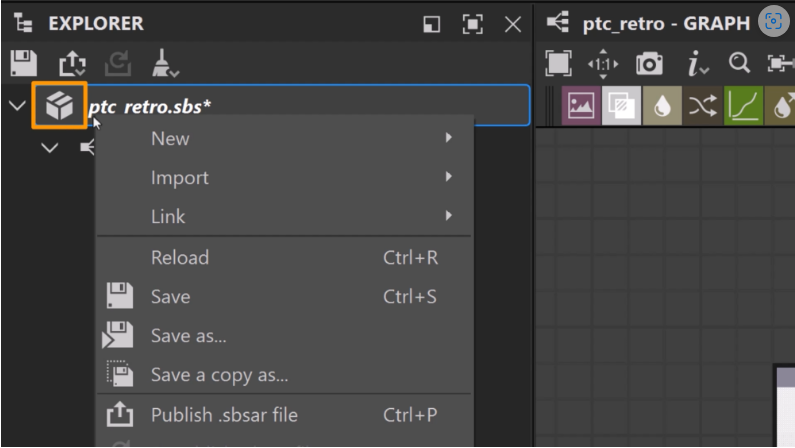
- Right-click the package in the Explorer Panel, select Import > Bitmap, and drag the image into the Input Node.
Step 4: Apply Retro Effects
4.1. Soft Blur
- Add a Blur HQ Color node and connect it to the input.
- Set Intensity to 0.25, then expose this as “Blur Intensity”.
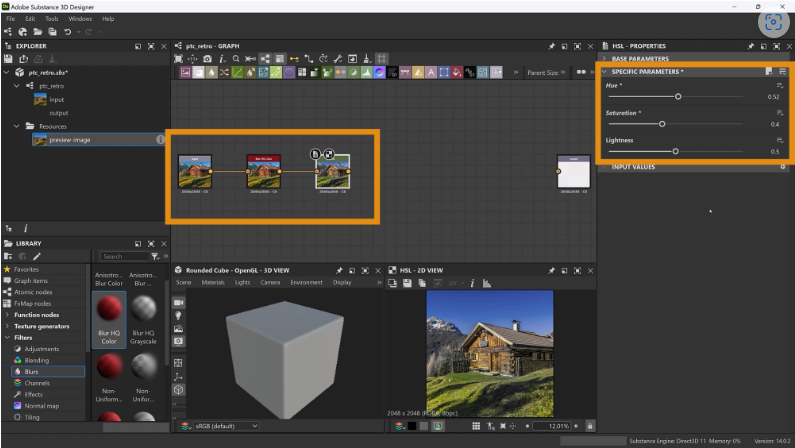
4.2. Adjust Colors
- Add an HSL Node to tweak hue/saturation.
- Set Hue: 0.52, Saturation: 0.4, and expose these settings.
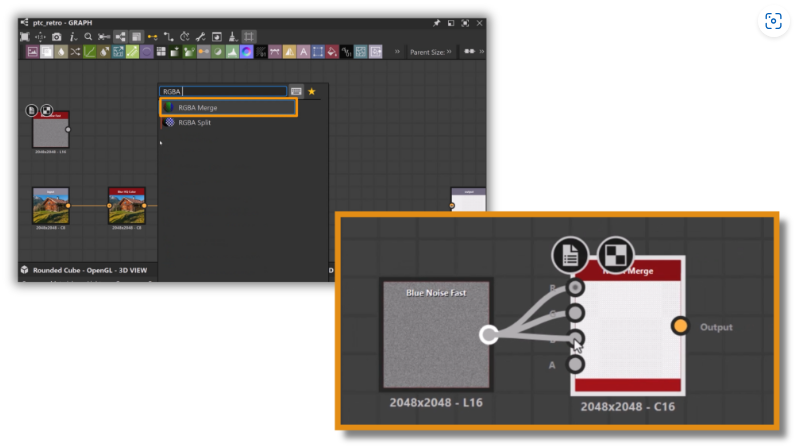
4.3. Add Film Grain
- Use a Blue Noise Fast node, merge it via RGBA Merge, and blend with Soft Light at 25% opacity. Expose as “Grain Opacity”.
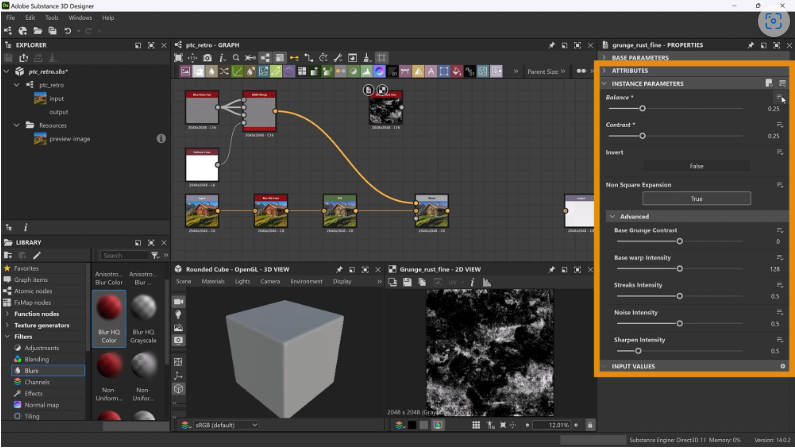
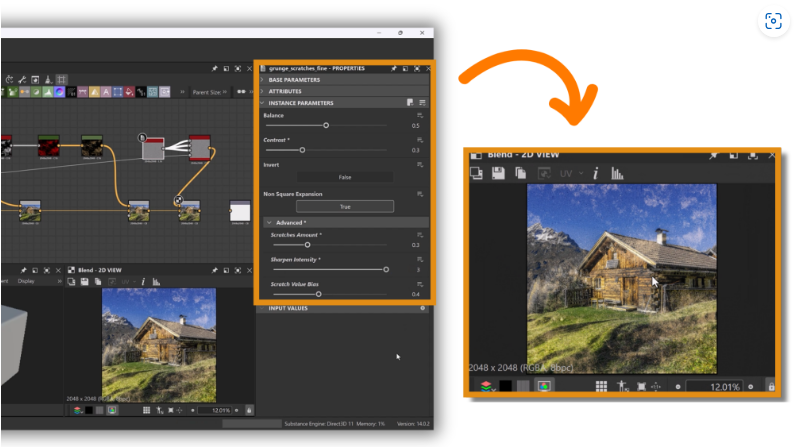
4.4. Vintage Stains
- Apply Grunge Rust Fine, adjust Balance/Contrast (0.25), and recolor with a Gradient Map.
- Expose Hue/Saturation as “Grunge Color” and “Grunge Saturation”.
4.5. Scratches
- Add Grunge Scratches Fine, tweak Balance (0.5), Contrast (0.3), and expose as “Scratch Amount”.
Step 5: Export & Use in Photoshop
1. Connect the final node to the Output.
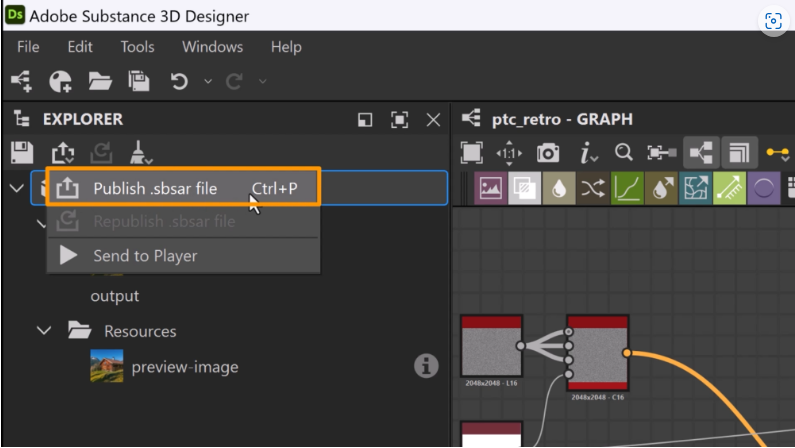
2. Click the package, select Publish SPSAR, and name it (e.g., PTC Retro).
3. In Photoshop Beta, go to Filters > Parametric Filters > +, and import your file.
Tip: Save presets by clicking the + icon in the filter panel.
How to Delete Custom Filters
1. Go to Filters > Parametric Filters.
2. Hold Ctrl (Win) / Cmd (Mac) and click the filter.
3. Click the trash icon to remove it.